A few choices made
Posted in: Aquaponics by Adrian on February 22, 2014
After struggling to find some of the pipe sizes at Bunnings for my auto siphon, Yesterday I took a trip to my local aquaponics shop – Hydroponics Express. They managed to convince me that a few of my choices in design of the system was wrong.
But firstly they warned me about using the IBC – they really have to be clean – oh yeah I said, I have scrubbed and scrubbed it. It must be clean!! The young guy suggested that I give it a quick blast with a high pressure washer to make sure it is really clean. So, today I yanked out the Karcher and blasted it! It would appear that it still had some product in there – not a lot but maybe enough. Remeber the product it was basically like glue so it dried up clear on the container. It was only noticeable as under high pressure, the spray deflected off it differently! Certainly is clean now!
The next discussion with him was around the plumbing. I was planning to initially use a Bell siphon – a bit of simple plumbing that when it fills with water, acts as a siphon to empty the tank. This is a widely used method but with this method the pump is usually run for about 15 minutes every hour and the growbed drains afterwards. The suggestion (and the method they use at the shop) is to leave the pump running continuously and run a slow feed into the grow bed. The drain is set to a height to keep most of the growbed flooded – almost to the top of the media. The media looks dry on top but is flooded not far below. The pump is mostly pumping back into the fish tank to keep their water moving about and just a trickle run up to the growbed. This is enough to keep the water in the growbed rotated and thus filtering the fish water.
They then said that they have a kit with everything I need to set this up. Even an eductor to keep the fish aerated as there is less flow coming from the grow bed than with a flood and drain setup. My problems solved – I got the kit!
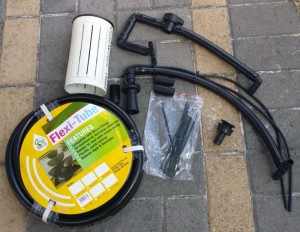
IBC Plumbing Kit
I also discussed media with them. I was leaning towards using pea gravel for the growbed media. He advised me that this would not work – I don’t actually believe this as there are many success stories on the net where it is used. However, after looking at expanded clay, I do believe that this is a better choice. It is much lighter than gravel. It would be much easier to work with and also much less weight on the framework supporting the growbed. I didn’t buy this but will in the near future.
What’s next? I have to lay half a dozen slabs to support it all and then start the assembly….Maybe in the cool of the morning…Stay tuned!
Aquaponics Project
Posted in: Aquaponics by Adrian on February 8, 2014
Here we go with a new thread in the blog. Those that know me know I have not posted in a while…But I thought I would try and blog my way through my latest project. Hopefully it will be of interest to someone else to see how I go about it.
Aquaponics is simply the co-habitation of fish and plants. I feed the fish, they poo in the water, I feed the water to the plants, they filter the water which is passed back to the fish! I end up with a feed of veg and fish! Simple really??!!?? Well we will see about that!
Being a bit on the techy side, I have already started to think about how I will go about automating this project. Maybe automating the operation of the pump and drain? Monitoring water flow, level and temp?? Either using an Arduino or Raspberry Pi (they are very small computers for the non techs!). These can all be adapted at a later stage but for the time being it will be a conventional setup!
There are commercially available aquaponics setups available but I feel that they are 1) a little costly and 2) no where near as much fun to setup! So I am working on converting an IBC (intermediate bulk container) into an aquaponics setup. An IBC is basically a 1000 litre plastic/pvc container with a steel frame. It will only be a small setup but only a little outlay which is a little loss if for some reason I do not continue with it. Most of my reading on how to do this was of course on the net, I found the site “IBC of Aquaponics” particularly useful.
I found a cheap ($70) IBC through gumtree which I was assured would be safe to use for aquaponics. It had previously had a waterbased emulsion so would clean up “easy” with water and dish washing detergent!
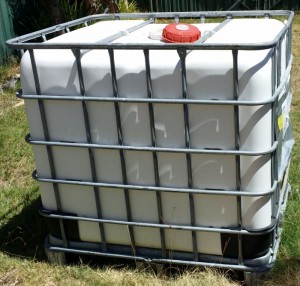
IBC as purchased
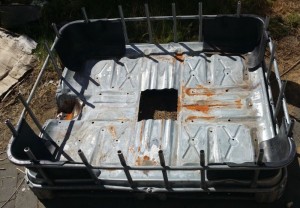
The first stage was to cut it open and clean it out. Cutting it was a pretty easy task – the plastic liner easily slides out so once removed, it was just a measure and cut with a jigsaw! I cut the top to about 300mm to for the garden bed and the remaining as the fish tank. The bottom piece should hold about 700L of water….Reasonably adequate as a fishtank!
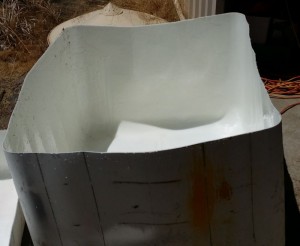
Bottom Half – The Fishtank
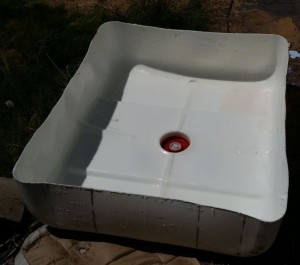
Grow Bed
The cleaning was a little arduous as the emulsion had began to set – it formed a very thin plastic like liner in the tank – about the thickness of cling wrap! But an afternoon with a scourer, chux and dishdrops got through this task (No I am not used to these tools as we have a dishwasher!). I then filled the base with water and allowed it to soak for several days. It was during this time that I discovered that this emulsion was very good at sticking to the hairs on your arm!
It was today that that the fun began as I cut the frame to match the liner. Mostly with the grinder – one of my favourite tools in the shed! The barwork was easy to cut and there is a cutout for the lid of the tank to poke through in the base. The top part of the liner actually goes into the base of the frame and vice-versa. I did however cut out a hole for the entire lid and later realised that the lid will actually sit comfortably in the frame and I only needed a hole for the plumbing! No harm done – it should still sit OK.
Growbed frame
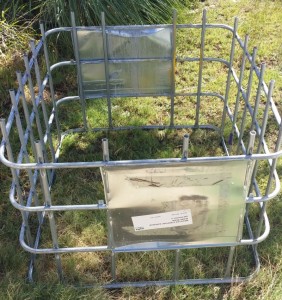
Fishtank Frame
It occurred to me that the growbed frame really needs a good scrub too as any runoff from rain etc may run down and contaminate the fishtank – That is a job for tomorrow! I gave the cut steel a coat of coldgal and once dry it was time to try out the assembly – Really as I was simply curious about how it was going!!

Sample Setup
This is not quite how it will sit, the growbed will actually sit about 100 further back to allow for better access into the fishtank. This is accomplished by placing some rafters under the growbed.
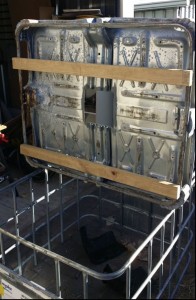
Growbed Rafters
Well, that is where I am at at the moment. What is next? I think I will relocate it to it’s final destination (I cannot easily move 700 litres of water!), fill it and start work on the plumbing.
 RSS Feed via Feedburner